What can I say? I have been gathering Pinterest idea after idea for the many months. Why oh Why did I resist joining Pinterest for so long? I do hate to run with the mainstream crowd but a good thing is truly a great thing sometimes!
ANYWAY.... here ya go. Some more fun, inexpensive, age appropriate, educational based (using fine motor skills) and critical thinking AND not terribly difficult ideas to do for those kiddos.
First, letter recognition practice using paper towel tubes and dot stickers. What more do I need to say? I would link the owner of this idea but I am afraid it is kinda everywhere so who knows where it started? Write letters on tube, matching letter on sticker and there ya go! I did a lower case and an upper case set for my soon to be K girl. She really needs more sound practice but this is fun while I am working with the "boys" on reading skills.
Next we have several items. Pool noodles cut into rings to stack/build/string. Although I have no idea what they would use to string them. My own children couldn't keep their hands AND feet out of the tub, lol.
Beside that are 8 bottles with rice, and/or beans, and/or blue sand in them. I placed random small items inside the bottles as I filled them to make I spy bottles (ie paper clip, brass tac, eraser, seas shell etc). I also took a picture of the items before I put them inside so the kids know what to look for when shaking the bottles around. I am in the process of laminating them so they can even use dry erase markers to cross off the items they find too. My big kids were less tempted with these at first but once littlest and I began checking them out they all joined in.
On the middle right is a box with sand at the bottom and brightly colored shells covering the sand. I would love to find some little shovels or something for "digging" in that box but haven't as of yet. I hid a few plastic fish, and a starfish inside that box too.
My previous post explains the sensory bags at the bottom right.
Here you see various sizes of screws with washers and nuts. The kids are to match the washers and nuts with the right screw and twist it all the way on. It requires some critical thinking and deductive reasoning to determine how to use all of them since bigger ones will fit on the smaller but then you will run out of pieces. I know many kids will give up before completing the entire task but some will stick it out. Either way it will occupy most for a short time. Here is the link for this idea:
click here
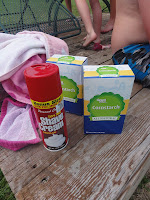
My husband didn't make it exactly like post described but it works. I glued magnets to the top instead of underneath because they were not strong enough through the cardboard. This is truly 3.62 cents at Rural King in hardware, a pool chlorine box cut apart and some freebie refrigerator magnets I glued word side down.
Lastly, I took a dishwasher tab box and hubby drilled holes to match those circle office stickers you can put on the holes in notebook paper. I know that was NOT a technical term but I honestly do not remember the official name of the product:)

I bought neon colored straws that were in a pack to match the stickers and there ya go. Hubby did have to smooth the holes out after he drilled but otherwise low cost too. Plus this tub can hold the package of straws inside it while not in use.
Then because we needed something the kids could actually keep we made washer necklaces today. I had seen an idea to design them like a baseball and put child's number on it for a end of season gift but this seemed like a low maintenance fun anytime idea for the 5-13 year kiddos I have with me. These washers were very inexpensive too, I think less than 2.00 for 8 or 10 of them. They designed them with nail polish and I had some bright colored plastic string lying around from bracelet crafts.
 |
| little one's face is because she is struggling to open the polish |
The finished product is below. I forget to take a picture before niece and nephew took their home so these are just my kids. The one on the necklace is my design. Notice I made a heart( of course for those who know me). It kinda looks like lips but you have to tilt your head to the left because silly me uploaded it sideways. Oops!


 A family that plays together stays together 4 sure!


